Wacom Bamboo A6 Tablet

I can't help but get the feeling that every time that I post it is about a new piece of gear that I buy!

This time its not camera related but it is relevant to the post processing section of the blog. Its the Wacom Bamboo A6 graphic tablet.

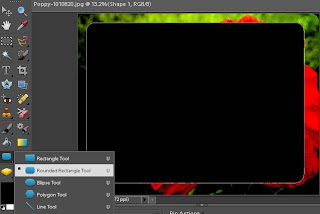
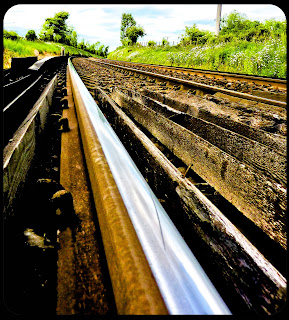
I decided to buy this after I got a bit tired of struggling to do fine details with the brush in Lightroom and also the lasso tool in Photoshop. It is a very nice piece of kit and it serves its purpose very well! Using the brush and lasso tool among others work much better and more accurately. The tablet itself is small but not to small to limit the accuracy of the pen placement. It has customizable buttons and a touch sensitive scroll wheel (like an ipod) This comes in extremely useful in Lightroom/Photoshop because it can be used to zoom in and out without having to touch the mouse or keyboard.

It cost £55 from EBuyer and my conclusion is that it was worth every penny!

I have uploaded a little unboxing vid so you can see the dimensions etc of the tablet.

(Soz it doesnt really fit in the box you may need to click it to watch it full)


Photoshop Rounded Photo Edges

Rounding the edges of your photos in photoshop, the quick and easy way!

This can be done  in most versions of Photoshop (as far as I am aware), and I tried it in Elements and CS4. I found a few different guides but I though
t they were slighlty over complicated. I am not going to use any photoshop jargon, just what buttons to press and when! I'll break it down into simple steps:

Step 1:
Select the rounded rectangle tool from the shapes option in the tool bar as seen in the picture.Change the radius of the rounded rectangle to about 125, this is done in the bar above your photo. Then select the area of the photo you wish to keep with the rounded edges. It will be a big black blob at the moment but that's what we want!


Step 2:
You need to unlock the background layer in the layers palette, right click on the first player which will be called background layer and click duplicate layer. Call it what ever you would like but now it will be unlocked and free to be moved. Do this by dragging it above the big black blob layer.

Step3:
I won't bother to explain what this process is as this is meant to be a quick and easy guide. So for this step simply click on the background layer in the layer paletee and press Control and G. Now press Control, Shift and E to combine all the layers! and there you have it, nice rounded edges!

Step4:
The photo you have just rounded will automatically have a white background, which means if you try to put your picture onto a website with a black b
ackground for example, the corners you have rounded with be white where the square edges used to be. Therefore if you want to post your photo onto  a black background, simply use the bucket fill tool to fill in the background with black, or any other colour you desire. This will mask the areas the rounded tool has cut away.

I hope this tutorial hasn't been too longwinded! Below are some examples of what your photos will look like, however these are using the black background.
 - James

Free photo software

I enjoy making photos into more fun and interesting things, just as turning a standard photo into a polaroid. I have had a look around the net for some good free and quick piecies of software to enhance your photos without the need to follow a detailed photoshop tutorial!

The first Program is called Polaroid, a small and extremely simple piece of software designed to turn your picture into a convincing polaroid! Not only does it mess with the colours it also adds smudge marks and lines to make your picture look like it has actually been handled.


I then simply found a decent looking handwriting font and bob's your uncle, perfect polaroids everytime!

The second piece of software I would like to recommend is Tiltshift. Where Tiltshift lenses can be expensive, this free site allows you to upload any picture and it will convert it to give it the miniature model look. My example is not that good as I did not really have any photos suitable enough, but check out Hammerhead's picture from Flickr for a really good example. Below is my example:


- James

Tamron 90mm 2.8 Macro

Me again!

Just a quick post to let you all know that I have treated myself to a new lens for my kit. I've never done any macro photography and I wanted to get into it so I had a look around at what are the best options out there and came to the conclusion that the Tamron 90mm offers excellent image quality and build for a very reasonable price. 

Here are some pics of the lens itself:


So far my impressions of the lens are very positive! Super sharp images and obviously excellent macro capabilities. Being a 1st time shooter of macro photography im finding it challenging as the Depth of Field is so thin at 1:1 magnification that if you are shooting handheld even the slightest body movement can throw it out of focus. But get it right and you nail some fantastic shots! Heres 2 that I took today out in the garden. Hopefully I will be posting alot more Macro shots as I take them. Highly Recommended Lens.


-- Craig