Rounding the edges of your photos in photoshop, the quick and easy way!

This can be done in most versions of Photoshop (as far as I am aware), and I tried it in Elements and CS4. I found a few different guides but I though
t they were slighlty over complicated. I am not going to use any photoshop jargon, just what buttons to press and when! I'll break it down into simple steps:
Step 1:
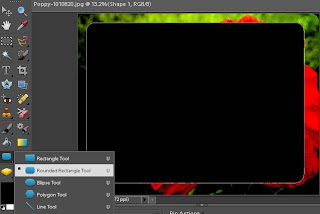
Select the rounded rectangle tool from the shapes option in the tool bar as seen in the picture.Change the radius of the rounded rectangle to about 125, this is done in the bar above your photo. Then select the area of the photo you wish to keep with the rounded edges. It will be a big black blob at the moment but that's what we want!
Step 2:
You need to unlock the background layer in the layers palette, right click on the first player which will be called background layer and click duplicate layer. Call it what ever you would like but now it will be unlocked and free to be moved. Do this by dragging it above the big black blob layer.
Step3:
I won't bother to explain what this process is as this is meant to be a quick and easy guide. So for this step simply click on the background layer in the layer paletee and press Control and G. Now press Control, Shift and E to combine all the layers! and there you have it, nice rounded edges!
Step4:
The photo you have just rounded will automatically have a white background, which means if you try to put your picture onto a website with a black b
ackground for example, the corners you have rounded with be white where the square edges used to be. Therefore if you want to post your photo onto a black background, simply use the bucket fill tool to fill in the background with black, or any other colour you desire. This will mask the areas the rounded tool has cut away.
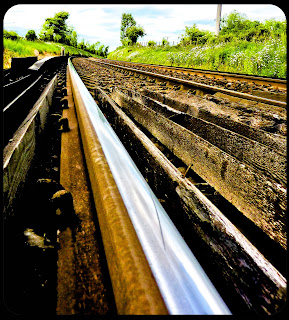
I hope this tutorial hasn't been too longwinded! Below are some examples of what your photos will look like, however these are using the black background.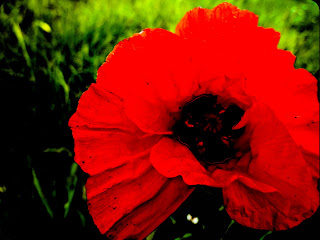
- James
0 comments:
Post a Comment